

We all love smooth skin and you don’t need to spend hundreds of dollars to get it. I’m a huge fan of making your own beauty and body products because you know exactly what is going into them. You know they are safe, you know the quality of the ingredients, and you know you aren’t getting ripped off. I have seen so many different recipes for body butter, but I tried this one the other day and had to share it with you all. The best part is, it only took me 30 minutes!
You will need…
1. Coconut butter (unrefined, organic, raw, cold-pressed)
2. Castor or jojoba oil (hexane free), shea butter (raw, grated, organic, optional)
3. Aloe vera gel (can get at any health food store)
4. Essential oils (of your choice)
5. A stove top or double boiler
6. A jar or container to hold butter.
What is super important to note about this recipe is that it is very forgiving. I was so worried that I would mess up the ratios and ruin my entire butter, but I improvised a little and it came out lovely. Don’t stress too much about the exact measurements, you really just want the dominant ingredients to be those that thicken or harden or else you’ll just have…body oil? After reading about 30 different recipes, a huge point was that these ingredients MUST be melted down, and they MUST harden before whipping. I’ve never tried, but I imagine whipping a hot liquid would prove difficult, so, make sure to let it cool. Another option to consider is that you may use aloe vera straight from the plant, but do take note that it will expire faster. Also, while the shea butter is optional, it helps make the butter a bit firmer.
Okay let’s begin.
½ cup Coconut oil
¼ cup Shea butter
2 tbs of Castor Oil
2 tbs of Aloe Vera Gel
10 drops of essential oil
I picked these particular ingredients because of their known benefits in natural skin care.
First, put a pot of water on to boil. Then, in a glass jar/bowl (make sure it’s sizeable as the container will be going into the pot of water to act as a melting mechanism), add the coconut oil, shea butter, castor oil and aloe vera. You’ll notice (if you have proper ingredients) that most are already liquefied except for the shea butter and coconut oil. However, adding them together and melting them down, allows for a smoother, more harmonious mixture.
Once the water is boiling, put the glass container into the pot of water. Make sure the water level is not too high because you don’t want water rushing into your jar and ruining your lovely mixture. Water in DIY almost always ensures faster expiry date as it is prone to bacteria. Once all of the ingredients are melted down (you can use a spoon or wooden pick to stir), take it out of the pot using gloves. CAUTION: this jar will be hot!. Add your essential oils. Good choices are lavender, vanilla, and rose, but it’s completely up to you.
Next, pour the hot liquid mixture into a container for whipping. I used a big metal bowl. Now this part is key. Let it cool first. You can put it in the fridge or freezer to speed up the process. Once the mixture begins to set or harden around the edges, it’s ready for whipping.
I began by just using a fork because unfortunately, I left mine in the freezer just a little too long. I used the fork to break it down into small chunks and as I began smoothing them out with my fork, it looked like cookie dough. Once it was soft enough, I took my whisk and whipped it up. You can whip it up as much as you’d like. The more you whisk, the more air gets in, which makes it fluffier.
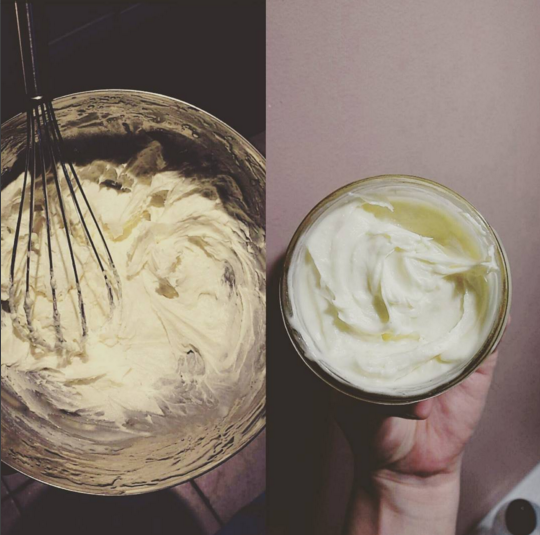 And Voila! It’s done. With just a little patience all of us can find a way to beat those hard winter hands in a natural and simple way. Now, let it whip!
Featured image via Laryssa Suaid on Pexels


Are those your legs in the photo?